Module 2: Bot Detection Lab
In this Lab we want to get familar with the Bot Detection Capabilities of AWAF. The goal is to create and apply a transparent Bot Defense Profile (signatures only) and enable logging for Bot requests.
Important
To only focus on Bot Defense, we will use the “vs_Hackazon_I” virtual server for this, because there is no WAF policy attached to it. If you wanna use a different VS, please make sure that there is no WAF policy active.

Create Logging Profile
Note
The “vs_Hackazon_I” virtual server already has a Logging Profile attached to it, which can be used for this demo. In case there is no Logging Profile attached or you want to create your own profile for this demo, use the steps described below.
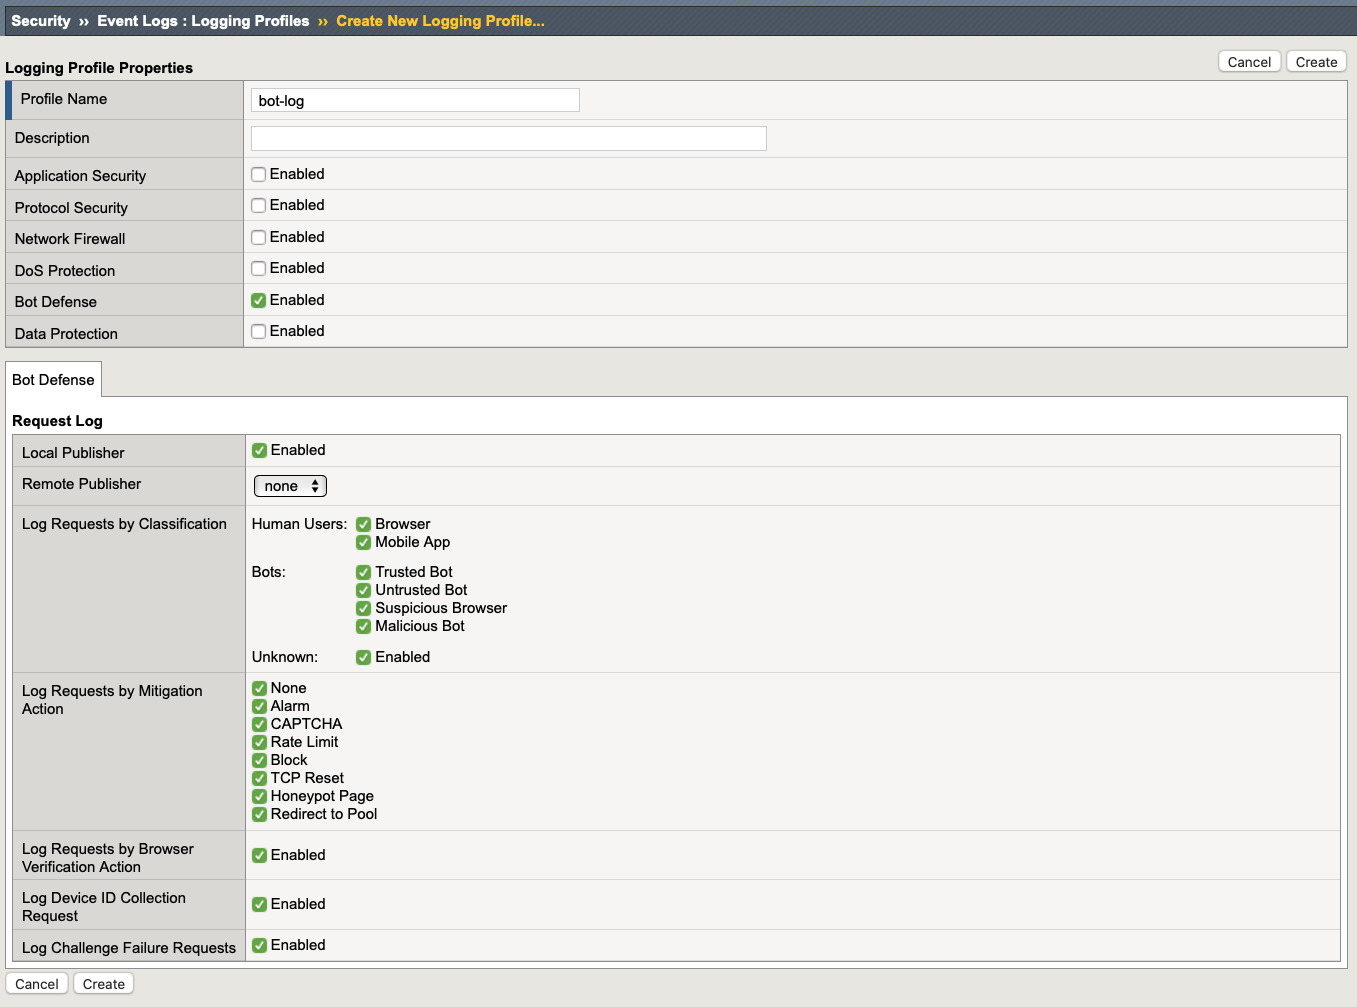
Navigate to Security > Event Logs > Logging Profiles and create a new Logging Profile with the settings shown in the screenshot below (local publisher with all options enabled).
Give it a name and click create.
Create Bot Defense Profile
Note
The “vs_Hackazon_I” virtual server already has a Bot Defense Profile attached to it, which can be used for this demo. In case there is no profile attached or you want to create your own for this demo, use the steps described below.
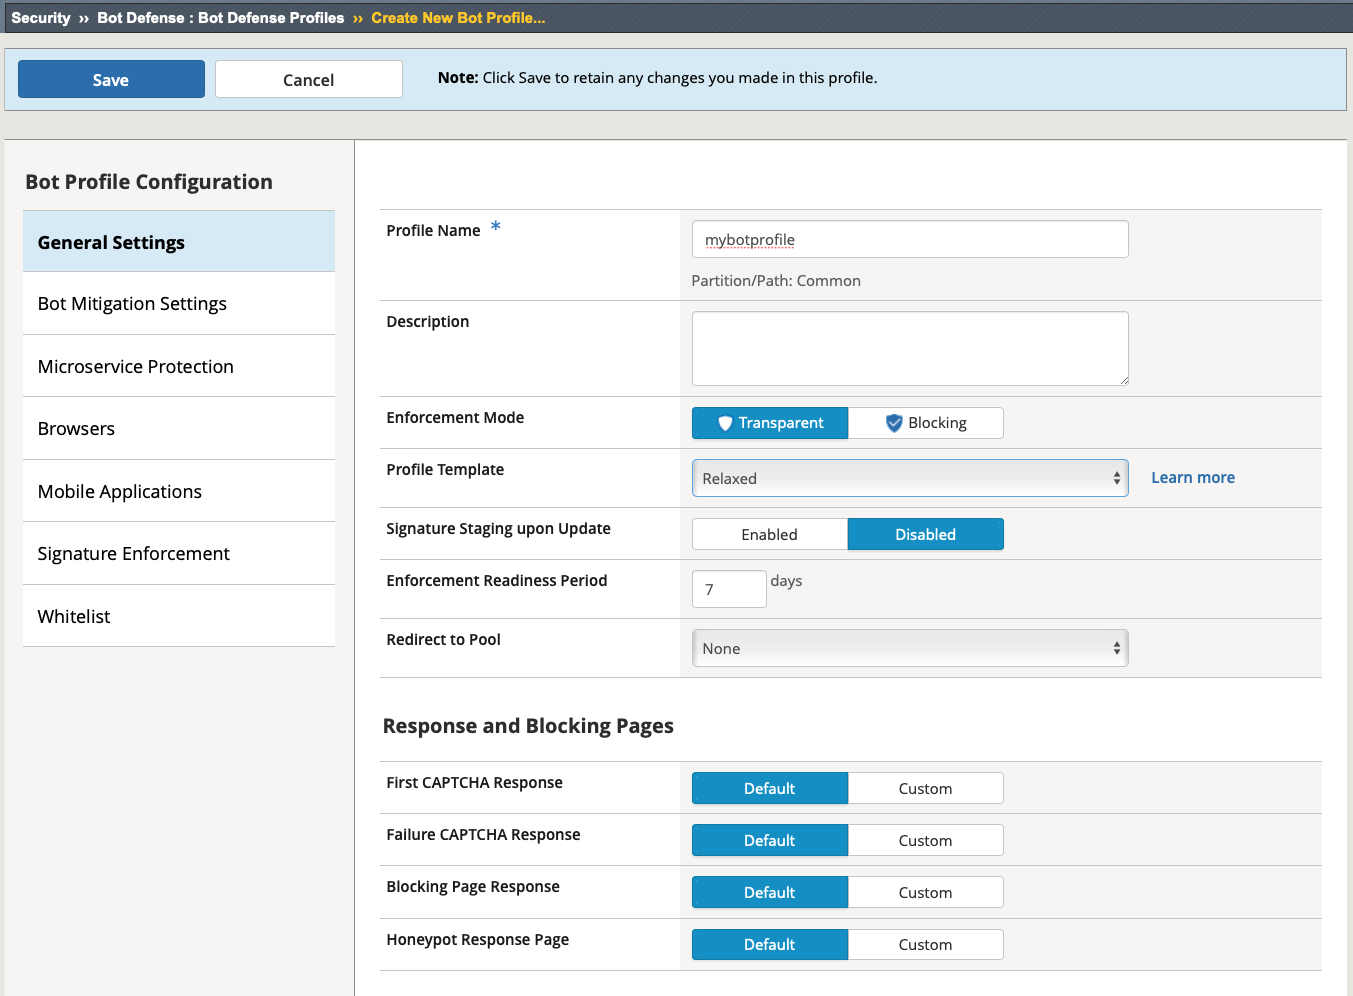
Navigate to Security > Bot Defense > Bot Defense Profiles and click Create.
Choose a name (e.g. mybotprofile) and set the Enforcement mode to transparent. Review the Bot Mitigation Settings and Signature Enforcement, but leave all settings on default for now (We will cover more options in Class 2 / Module 1).
Click Save
Enable Bot Defense and Logging
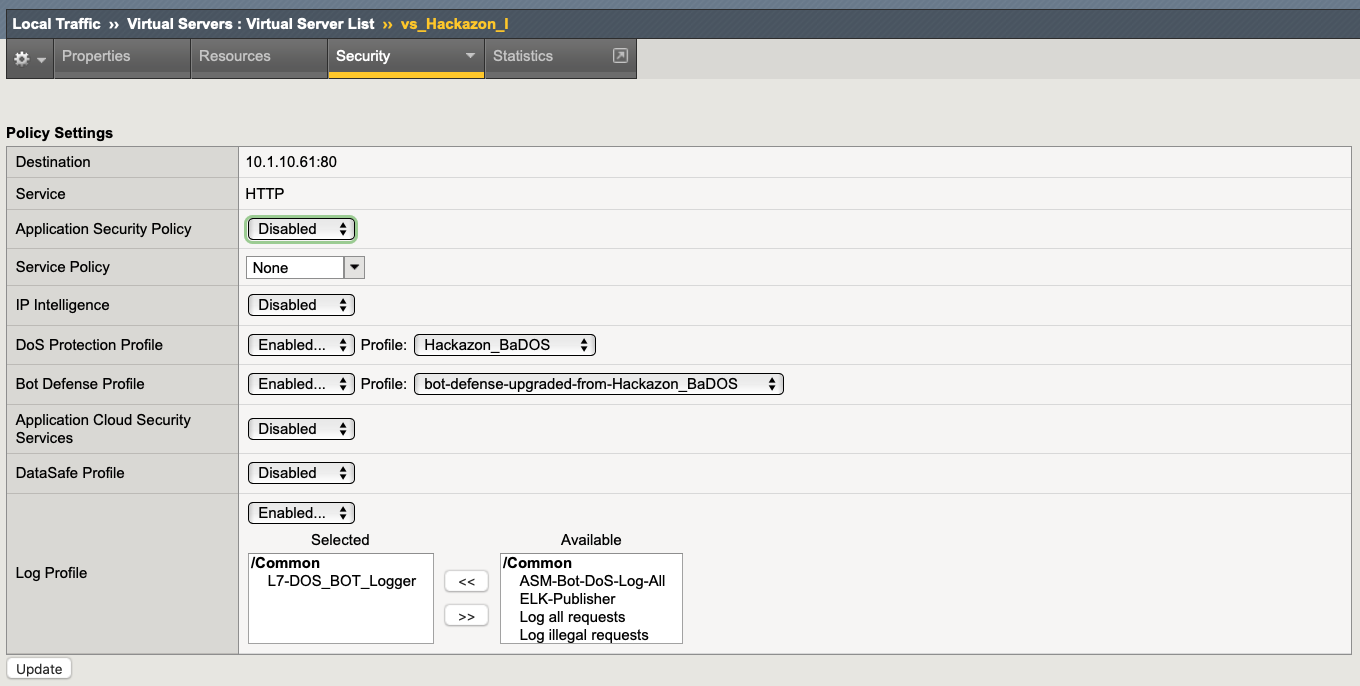
Navigate to Local Traffic > Virtual Servers > Virtual Server List > vs_Hackazon_I
Click on the Security Tab and click Policies.
Enable Bot Defense and Logging with the profiles created before. (as mentioned before, you can use the preconfigured settings for this demo)
Click Update
Note
Make sure there is either the existing Logging Profile: L7-DOS_BOT_Logger or the new created Logging Profile attached to this VS.
Start generating Traffic
Open a ssh session to the Kali system.
Note
To open a ssh session to UDF you need to provide your public key. For more information, please refer to the UDF documentation.
make sure you are in the directory:
/home/ec2-user
start generating traffic by using the script “baseline_menu.sh”:
sudo su
screen + press ENTER
./baseline_menu.sh
choose 1
de-attach by clicking Ctrl+a+d
screen
./baseline_menu.sh
choose 2
de-attach by clicking Ctrl+a+d
Activate both options:
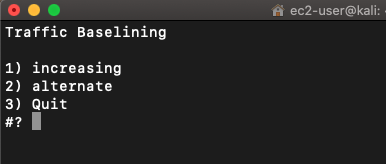
it should look like this:

Navigate to Security > Event Logs > Bet Defense > Bot Traffic and review the Dashboard. Click on the “vs_Hackazon_I” VS to see more details for this specific Application.
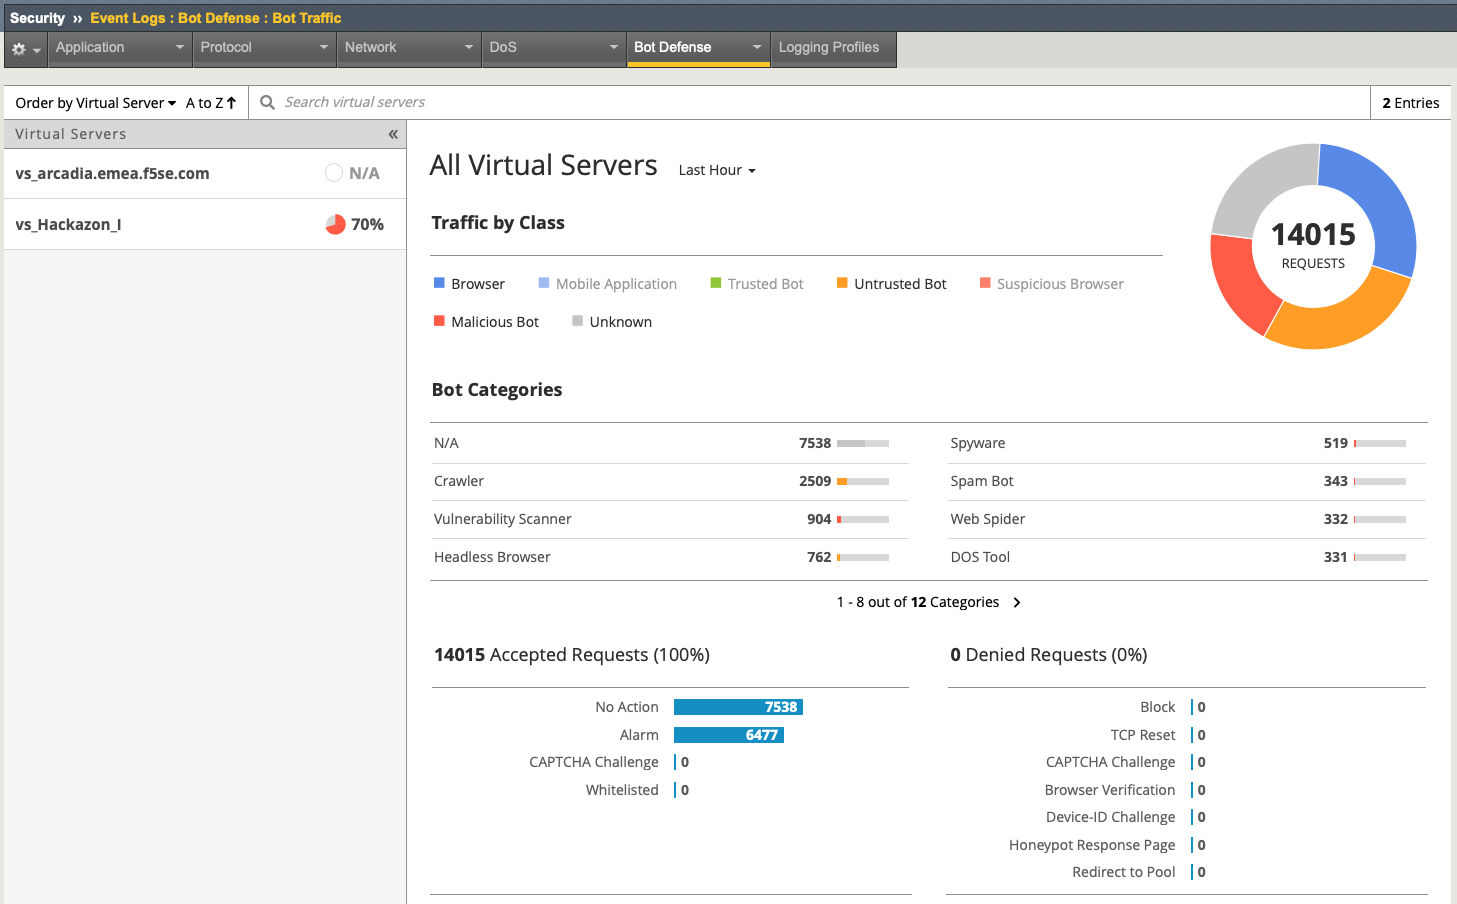
Note
It may take some time before you can see some results.
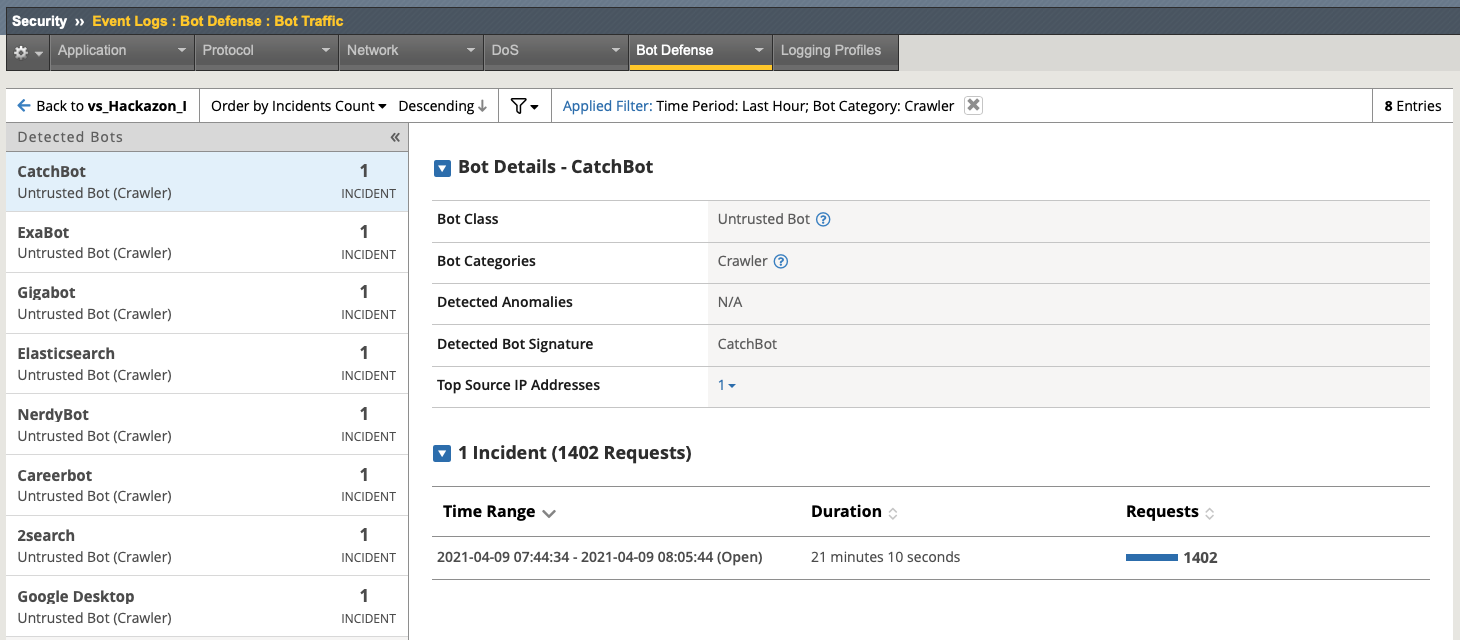
Click on any Bot Categories to see detected Bots (per category)
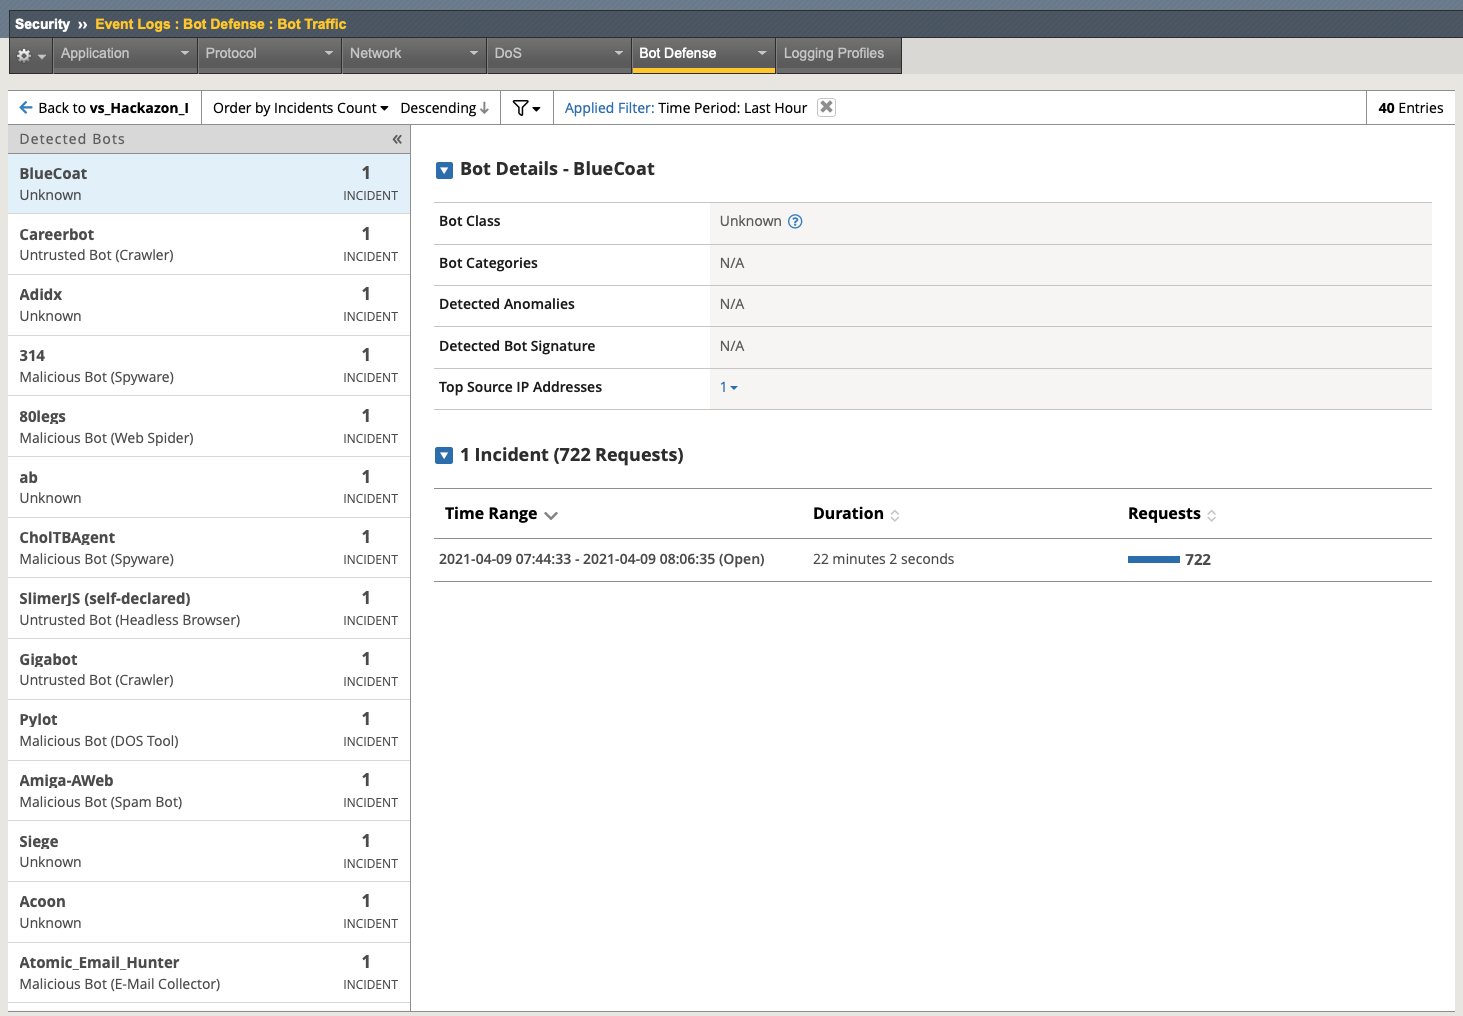
Go back to the Start Dashboard ans click on “detected Bots” to see all.
Override settings and create execptions for specific bots
Note
It may occur, that some Bots are detected as false positives and/or the false mitigation action will be applied. In this case, you can create exceptions to override the default settings per bot.
Navigate to Security > Bot Defense > Bot Defense Profiles and click on the profile (either your own or the preconfigured bot-defense-upgraded-from-Hackazon_BaDOS profile).
Click on Bot Mitigation Setings
On the Bottom, click on Add Exception
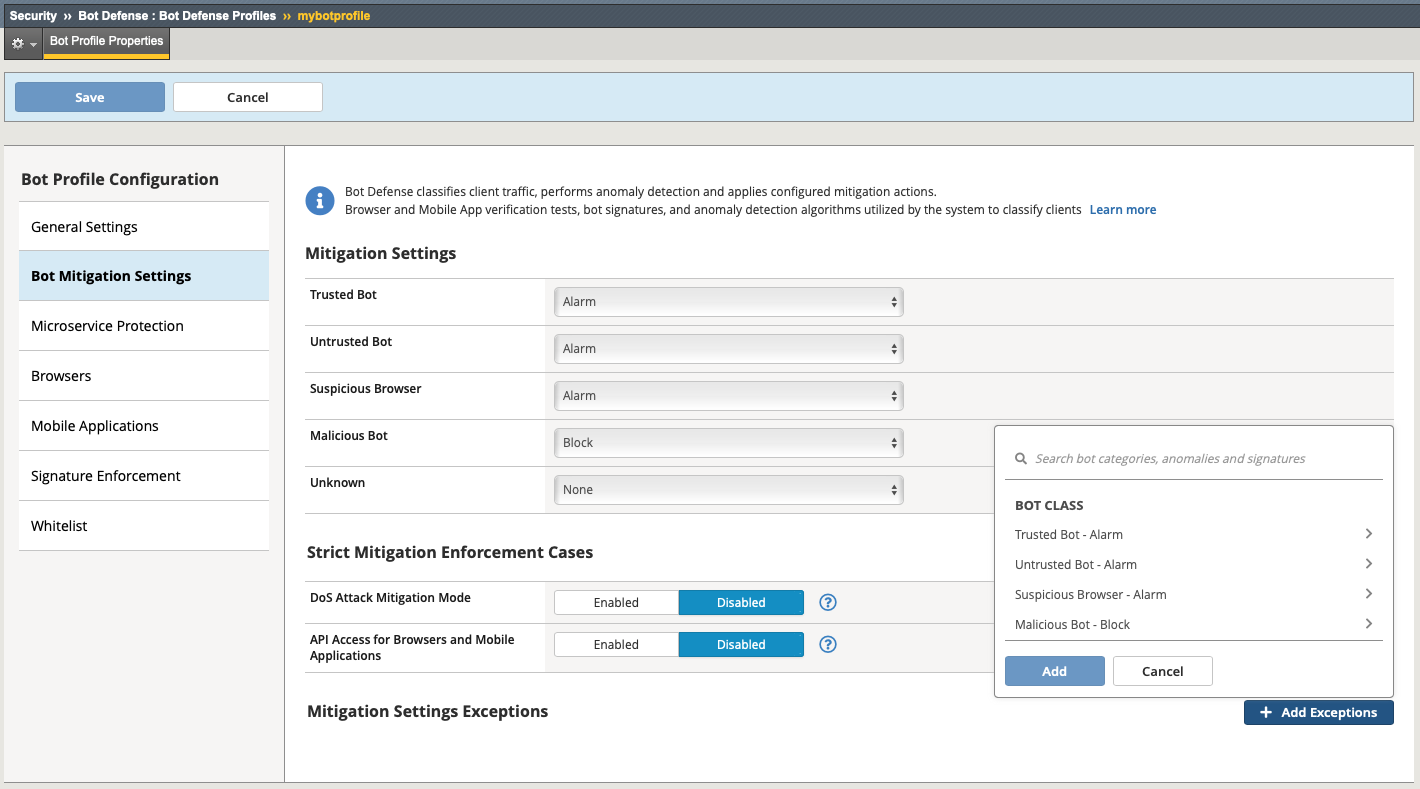
Note
The system automatically stores all seen bots (and based on signatures) sorted by classes and categories.
In the search field type in: curl to filter for this specific type, select curl (category: untrusted bot) and click add.
You now can define a specific action for curl, which overrides the global action for this category (untrusted bot). Exceptions are are on a per profile basis. Change the action to “block” and click “Save”.
Open a Terminal Server Session to the “Windows Client System” and run the “01-Curl-Bot” batch-file, located on the Desktop.
Back in TMUI navigate to Event Logs > Bot Defense > Bot Requests verify the requests seen.
Note
As the baseline script is still running, it may be needed to search for a specific log entry. Click the filter icon and select “denied”, to display only blocked requests.
Congratulations! You have just completed class 1 - module 2.
See class 2 - module 1 for more advanced configuration.