Module 2: Check how Application Traffic Insights works
In this module, we will work with Application Traffic Insights and get the identifier reported back into /var/ltm/log of BIG-IP. Additional BIG-IP reports into ELK Stack and within the ELK Dashboard we correlate data i.e. Device Identifier, User, IP and Unified BOT Information for anaylses.
Application Traffic Insights Overview
Application Traffic Insight (ATI) is a Proof of Value (PoV) tool that allows customers to explore different Shape products and understand their benefits and value (free of charge for a period of 60 days). ATI is an easy-to-use, self-service deployment with multiple deployment options on a variety of platforms (F5 or otherwise).
Note
If you haven´t worked with Application Traffic Insight (ATI) before, please review the Application Traffic Insight (ATI) Article on Volterra Docs.
Application Traffic Insights is easy-to-use as it allows flexible and easy deployment using Big-IP, NGINX, SSE, AWS and JS snippet Give the customer compelling Proof of Value (PoV) charts/dashboards.
Device Traffic Dashboard
Bot Assessment Dashboard
Check how Application Traffic Insights Overview* works
Connect to BIG-IP named “BIG-IP 16.1 - All Demos” via TMUI.
Within the WebUI of the BIG-IP instances navigate to iApps › Application Services : Applications › Application_Traffic_Insight and select Reconfigure.
Within the iApp configuration you will find predefined JS Injection configuration in the 1JS part. Furthermore the 1JS gets been injected on the Virtual Server named arcadia.emea.f5se.com_vs. We leave the rest of the configuration untouched.
Note
Volterra on ATI on VoltConsole cover the Application Traffic Insight onboarding in more detail.
Application Traffic Insights and iRule
Application Traffic Insights includes two identifiers - a residue-based identifier and an attribute-based identifier. The residue-based identifier is based on local storage and cookies. The attribute-based identifier is based on signals collected on the device. The two identifiers always have different values.
1JS writes both the residue-based and attribute-based identifiers in a single, first-party cookie called _imp_apg_r_. The _imp_apg_r_ cookie is URL encoded with the following format:
%7B%22diA%22%3A%22AT9cyV8AAAAAd60uXCtYafPTZGLaVAku%22%2C%22diB%22%3A%22ASJ4gFmzPo%2Fa8AHJceWhykudRoXeBGlP%22%7D
This cookie can be decoded via https://www.urldecoder.org/ to get the response in clear text. The decoded cookie has the following format:
"diA": "AT9cyV8AAAAAd60uXCtYafPTZGLaVAku"
"diB": "ASJ4gFmzPo/a8AHJceWhykudRoXeBGlP"
Note
Here, diA represents the residue-based identifier and diB represents the attribute-based identifier.
How to decode Application Traffic Insights _imp_apg_r_ cookie with an iRule
Within BIG-IP we use an iRule named print_deviceid and do a URL decoding of the _imp_apg_r_ cookie and log diA and diB into /var/log/ltm of BIG-IP.
The irule named print_deviceid has been attached to Virtual Server named arcadia.emea.f5se.com_vs.
How to test Application Traffic Insights
To verify and view the logged values, connect to BIG-IP named “BIG-IP 16.1 - All Demos” via SSH.
Run run util bash followed by tail -f /var/log/ltm in the SSH Session.
RDP to windows machine called win-client.
Launch Chrome.
Open Devtools (Keyboard F12), select XHR in the Devtools and select the Browser Tab named Device ID check.
Check the request and response in Chrome.
Also check the cookie on the Devtools under Application.

You may want to do further test by running Chrome in Incognito Modus and compare the values of diA and diB with the outcome of the previous test.
Also check tail -f /var/log/ltm in the SSH Session as the values of diA and diB of the _imp_apg_r_ cookie have been written to the file.
Application Traffic Insights and ELK |
Within the UDF Environment you will find an instance called ELK. Here we run an ELK Container which is used to visualize Device Identifier and correlate data i.e. Username to Device ID; Geo IP to Device ID. Additional AWF Unified Bot Protection log events into ELK. Those logs been correlated as well.
Note
This is a MVP. So please reach out if you have use cases which we should add to the Demo.
Steps:
RDP to windows machine called win-client. The Password of the instance is listed within the Details / Documentation Tab.
Launch Chrome and choose the bookmark called Kibana - Dashboard.
Klick the Button left to “Home”. Within the Kibana Section you can choose between Discover or Dashboard.
Note
Within the Dashboard you will find pre-configured Visualizations. The Dashboard has only a limited space in terms of sizing. In case you want to anaylses a specific Visualization, use the function called Maximize Panel.
Demo Use Cases - Single Device accessing unauthorized accounts
Within here we will Demo sudden fluctuations in Users per DeviceID.
Steps:
Launch Chrome and discover the browser and access the bookmark called Device ID check. This will launch the Arcadia Application.
Navigate to the Login section of the Application.
Try to login with different random Username.
Go back to Device ID+ Kibana and select Dashboard.
Here you will see that a single Device (single Device ID Type A and Type B) tried to access the App with differnet Username.
If you like to Demo it with Postman, open Postman, start New Runner Tab by navigating to the File Menu of Postman.
From Runner drag the collection Device ID+ ELK into the Field RUN ORDER.
Choose the Source Data File named Demo_1.csv by using the select file menu.
Via preview check which Data we will Post via Runner to login page of Arcadia Application.
Now Press Run Device ID+ ELK in Runner.
Demo Use Cases - Deliberate use of proxy networks
Within that use case you will cover a single Device accessing unauthorized accounts from different Source IPs.
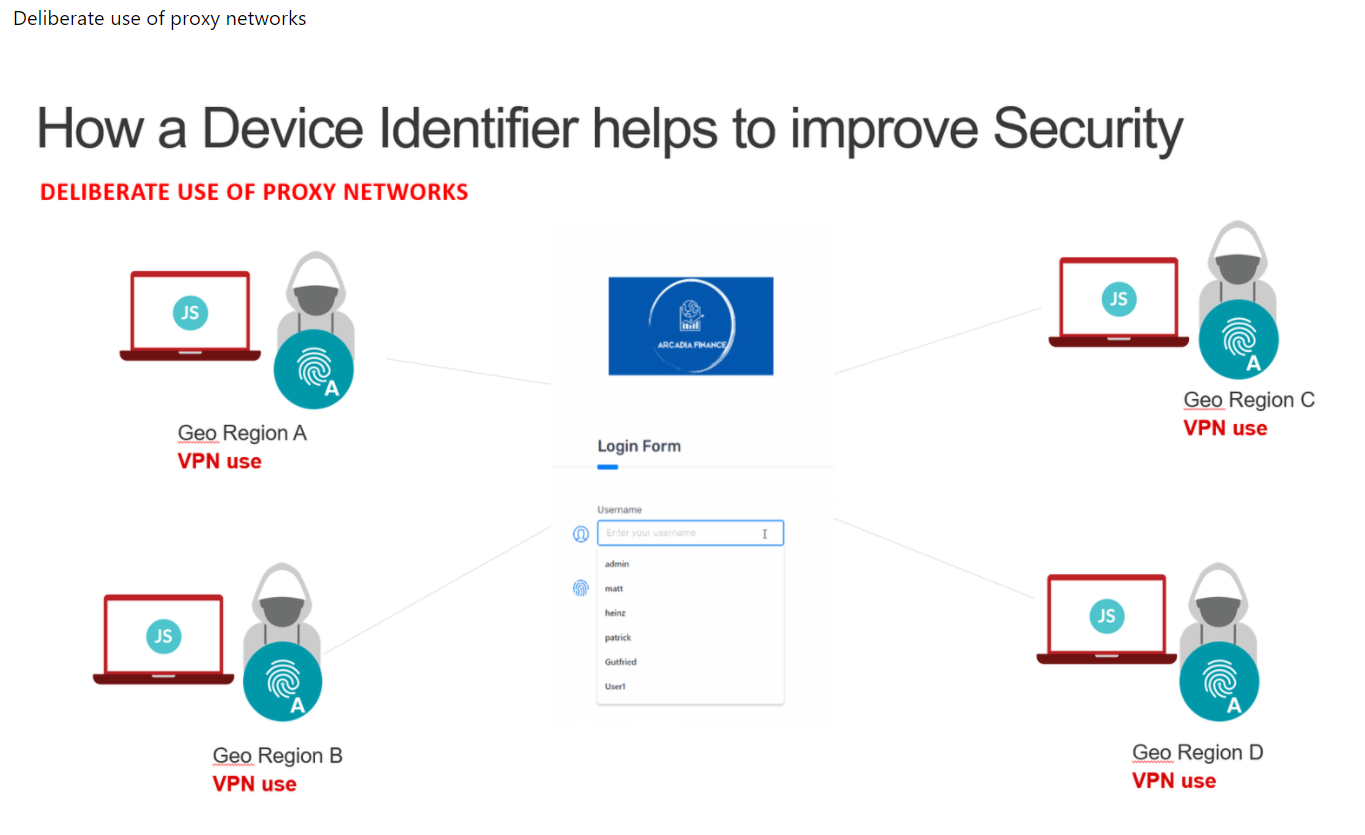
You will use Postman Runner to simulate 10 Request with 10 different Username using 10 different IPs but the same Device ID.
Steps:
Open Postman, start New Runner Tab by navigating to the File Menu of Postman.
From Runner drag the collection Device ID+ ELK into the Field RUN ORDER.
Choose the Source Data File named Demo_2.csv by using the select file menu.
Via preview check which Data we will Post via Runner to login page of Arcadia Application.
Now Press Run Device ID+ ELK in Runner.
Go back to your Kibana Dashboard.
Within here you see again there is only one Device ID Type A / Device ID Type B identifier generated.
The requests coming from 10 different geo locations.
Ten Usernames have been used with one Device ID Type A / Device ID Type B to logon to the page.
Demo Use Cases - Unusual Devices accessing user accounts
Within this Demo we will use Postman Runner to simulate requests coming from different devices sitting behind a proxy network. The Source IP will be the same however, the Device ID Type A / Device ID Type B will change on the malicious request. You´ll also see valid request coming from username xyzgood.
Steps:
Open Postman, start New Runner Tab by navigating to the File Menu of Postman.
From Runner drag the collection Device ID+ ELK into the Field RUN ORDER.
Choose the Source Data File named Demo_3.csv by using the select file menu.
Via preview check which Data we will Post via Runner to login page of Arcadia Application.
Now Press Run Device ID+ ELK in Runner.
Go back to your Kibana Dashboard.
Within here you see that various Device ID Type A / Device ID Type B have been generated by a single IP.
If you invest further, you´ll see potential valid requets as these coming from a unique User by a Unique IP generating a single Device Identifier.
On the other hand you see differnt Device Identifier been generated by the same IP using random Usernames.